

Tuesday, August 12. 2008
Guide to blogging in Dhivehi using WordPress
Here is a short guide to using Thaana to make posts in Dhivehi using the free WordPress blogging service. I regularly get emails from different people asking me for help on this topic, so I hope this is helpful to all such people  .
.
The solution presented here can be used on the free Wordpress blogging accounts available from WordPress.com and also on custom installs of WordPress. Please be aware, however, that there are much better ways to setup WordPress for Dhivehi posting if you have a custom install of WordPress or have a paid WordPress account.

2. In the post editor area, find and click the "HTML" tab to switch the view to HTML mode.
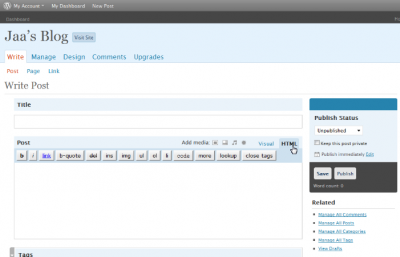
3. Copy and paste the following code into the editing area. It contains the bare minimum HTML/CSS needed to correctly display Dhivehi on all browsers supporting right-to-left text display in Unicode.

4. Tinker around with the font family and font size settings if you know some CSS (or are feeling adventurous enough!). Faruma is probably the most decent Dhivehi Unicode font and is installed on most computers - hence is listed as the first preference. Different people like different font sizes for Dhivehi but 14px and 16px, I think, tend to be the easiest on the eye.
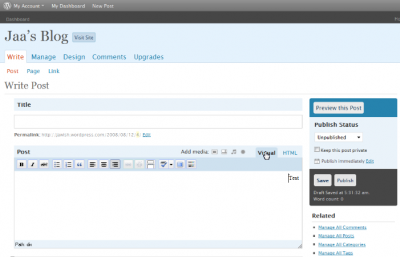
5. Click the "Visual" tab to switch the view back to the normal WYSIWYG mode.
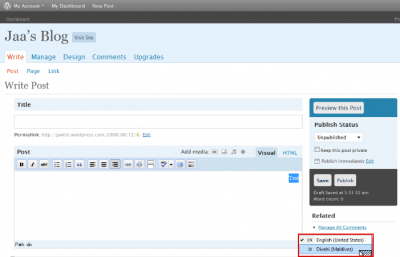
6. Switch the keyboard to "Divehi" on the computer.
7. Select or delete the "Test" text on the post editor and start writing in Dhivehi.

That's all it takes!
Notes:
Unfortunately, there is no way to apply proper formatting to the post title with the free accounts on WordPress so you will have to settle for the out-of-alignment title display.
Video guide:
I thought it'd be fun to make a video guide for this and here is what thus materialized: View good quality | View crap quality (Youtube)
Good luck with the blogging!
.The solution presented here can be used on the free Wordpress blogging accounts available from WordPress.com and also on custom installs of WordPress. Please be aware, however, that there are much better ways to setup WordPress for Dhivehi posting if you have a custom install of WordPress or have a paid WordPress account.
Requirements
You need to have the Dhivehi keyboard installed on your computer. If you already type Dhivehi, say using MS Word or OpenOffice, then you have this already. See this post by Fayid if you need help with getting the Dhivehi keyboard installed.Steps
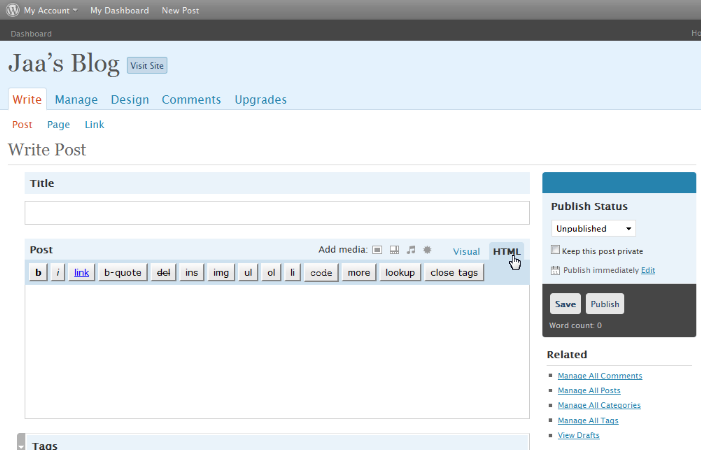
1. Login to WordPress and click on the "Write" tab to start a new post.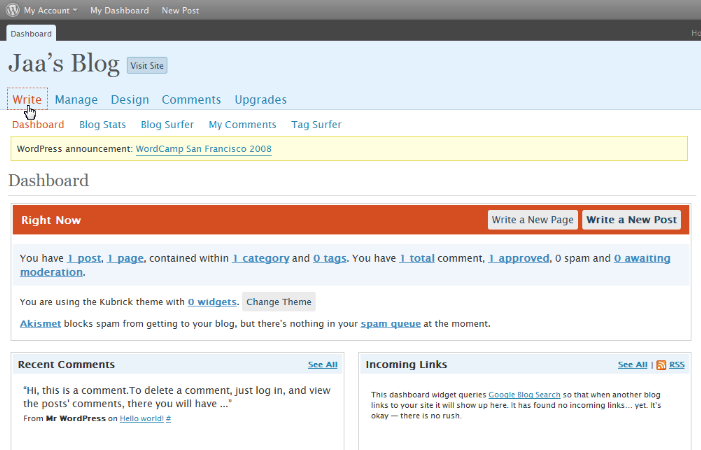
2. In the post editor area, find and click the "HTML" tab to switch the view to HTML mode.
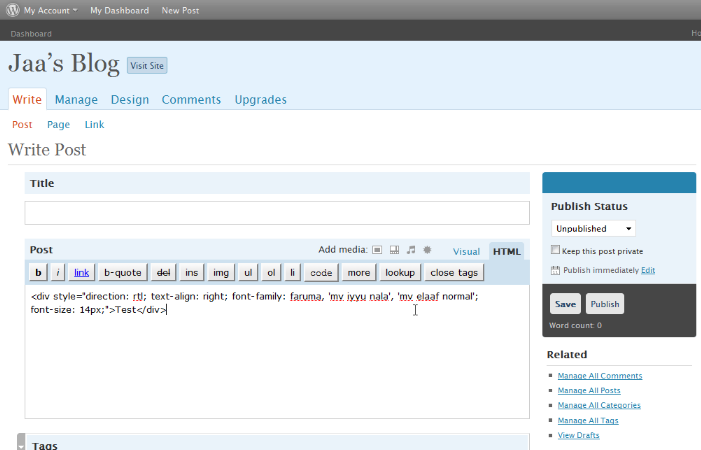
3. Copy and paste the following code into the editing area. It contains the bare minimum HTML/CSS needed to correctly display Dhivehi on all browsers supporting right-to-left text display in Unicode.
Test
4. Tinker around with the font family and font size settings if you know some CSS (or are feeling adventurous enough!). Faruma is probably the most decent Dhivehi Unicode font and is installed on most computers - hence is listed as the first preference. Different people like different font sizes for Dhivehi but 14px and 16px, I think, tend to be the easiest on the eye.
5. Click the "Visual" tab to switch the view back to the normal WYSIWYG mode.

6. Switch the keyboard to "Divehi" on the computer.

7. Select or delete the "Test" text on the post editor and start writing in Dhivehi.

That's all it takes!
Notes:
Unfortunately, there is no way to apply proper formatting to the post title with the free accounts on WordPress so you will have to settle for the out-of-alignment title display.
Video guide:
I thought it'd be fun to make a video guide for this and here is what thus materialized: View good quality | View crap quality (Youtube)
Good luck with the blogging!


