
Friday, March 3. 2006
DIY PocketPC based projector
I built a "projector" yesterday. It uses the same approach taken by the many DIY Projector plans (link1 link2) found on the net.
A projector consists of three basic elements: projection lens, image source, projection light. The projection lens is what magnifies the image from the image source. The projection light gives enough juice for the image from the image source to appear on the projection surface. The DIY plans usually make use of a Fresnel lens as the projection lens, a TV/LCD as the image source and metal halide bulbs are the projection light. These components can be obtained *relatively* cheaply.
Materials:
My projector is quite simple.
I decided to use my ageing HP 5550 Pocket PC as the image source. The screen has a resolution of only 320 x 240 pixels, but it is more than enough for watching movies or projecting the usual Pocket PC applications - atleast enough for my use. I then got a handy sized fresnel lens off Ebay for less than 2 quid. I used cardboard I had lying around to make the projector housing.
Construction:
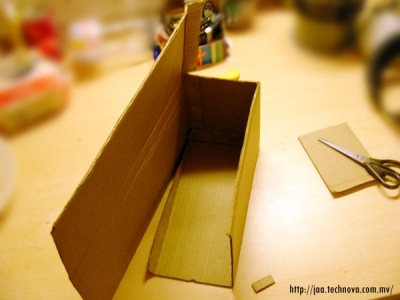
1. The cardboard was fashioned into a box.
2. A rectangular hole was cut at one end to make room for the fresnel lens.
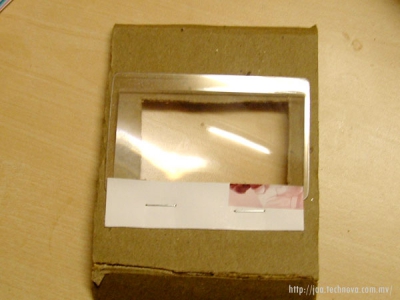
3. The fresnel lens was mounted on a separate piece of cardboard to be pushed into place inside the box.
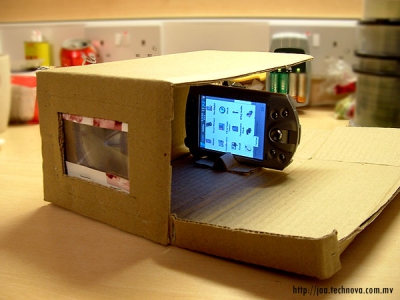
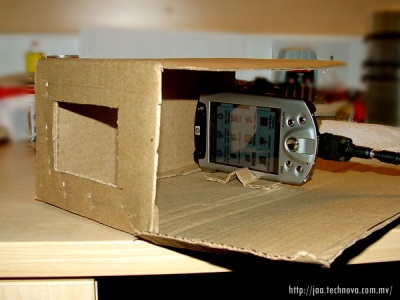
4. The Pocket PC was positioned appropriately inside the box.

5. Finished product!
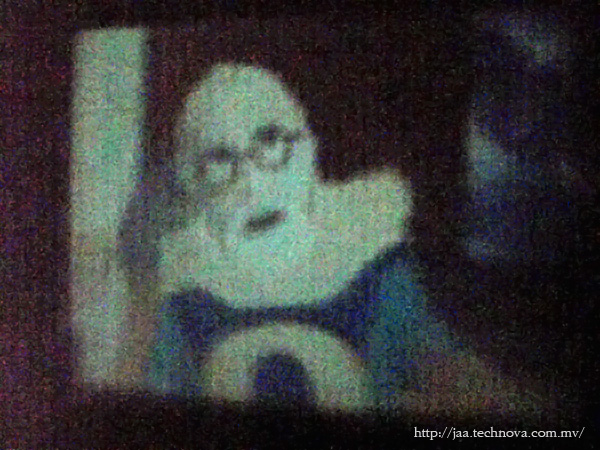
Results!
Since I had no screen and nor was I bothered to make one, the off-white colored wall in my room was to act as my screen. The projected image size was around 4 feet - a limitation due to the small size of my room.

Now, it's time for popcorn(not really) and a showing of Stargate Atlantis season 2!
Toodles.
A projector consists of three basic elements: projection lens, image source, projection light. The projection lens is what magnifies the image from the image source. The projection light gives enough juice for the image from the image source to appear on the projection surface. The DIY plans usually make use of a Fresnel lens as the projection lens, a TV/LCD as the image source and metal halide bulbs are the projection light. These components can be obtained *relatively* cheaply.
Materials:
My projector is quite simple.
I decided to use my ageing HP 5550 Pocket PC as the image source. The screen has a resolution of only 320 x 240 pixels, but it is more than enough for watching movies or projecting the usual Pocket PC applications - atleast enough for my use. I then got a handy sized fresnel lens off Ebay for less than 2 quid. I used cardboard I had lying around to make the projector housing.
Construction:

1. The cardboard was fashioned into a box.

2. A rectangular hole was cut at one end to make room for the fresnel lens.

3. The fresnel lens was mounted on a separate piece of cardboard to be pushed into place inside the box.

4. The Pocket PC was positioned appropriately inside the box.

5. Finished product!
Results!
Since I had no screen and nor was I bothered to make one, the off-white colored wall in my room was to act as my screen. The projected image size was around 4 feet - a limitation due to the small size of my room.
Now, it's time for popcorn(not really) and a showing of Stargate Atlantis season 2!
Toodles.